


How to Edit Video on Your Mac with Quicktime

All new Macs include a copy of iMovie, Apple’s consumer-focused video editing application, and more advanced video editors such as Final Cut Pro and Adobe Premiere are also available on the Mac. But if you just need to make some quick edits to a video file’s length or combine a few clips into a single file, the built-in QuickTime app can get the job done.
To get started, first open a compatible video file in QuickTime. It’s important to note that while QuickTime supports many common video file formats, it doesn’t support everything, and you may need to convert your video using an application like Handbrake first.
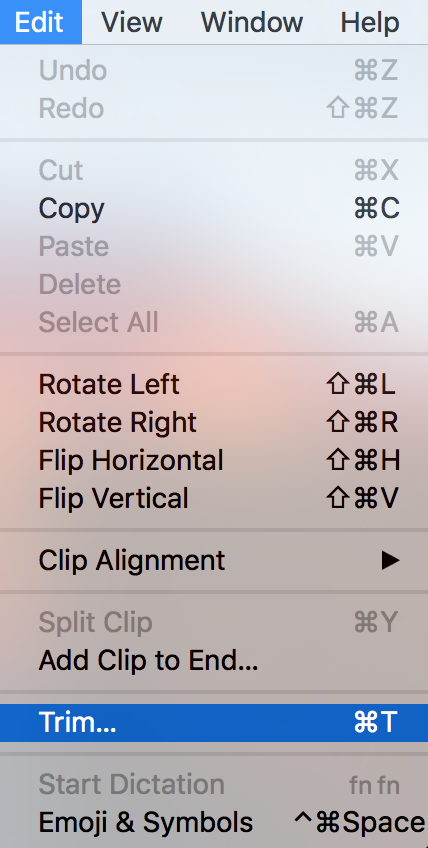
Once your video file is open in QuickTime, you’ll find a few very useful video editing options. The first is the Trim function, which can be found in the Edit menu or by using the keyboard shortcut Command-T.
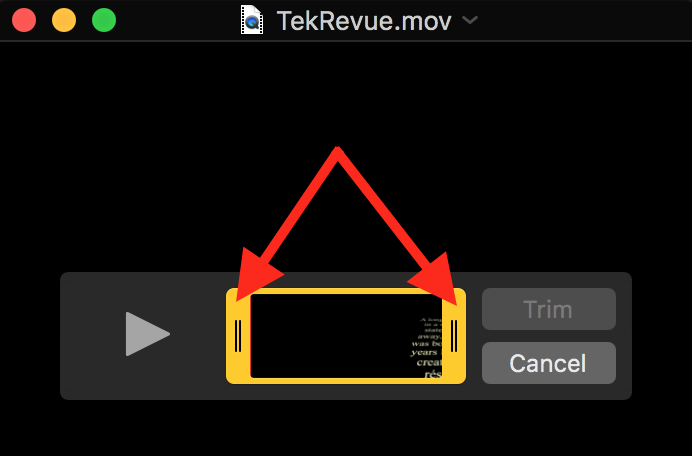
Once activated, the Trim function displays a yellow outline around your video timeline with clickable “handles” at the start and end. You can click and drag on these handles to trim unwanted footage from the start or end of your file. After dragging one or both handles inward and clicking Trim, QuickTime will “toss out” the extra footage and give you a file that includes only the footage within the yellow outline.
While the Trim function lets you remove unwanted footage from the start or end of your video file, the Add Clip to End function will let you append a second video file to the end of your video. There’s no keyboard shortcut by default for Add Clip to End, so look for it under the Edit menu.
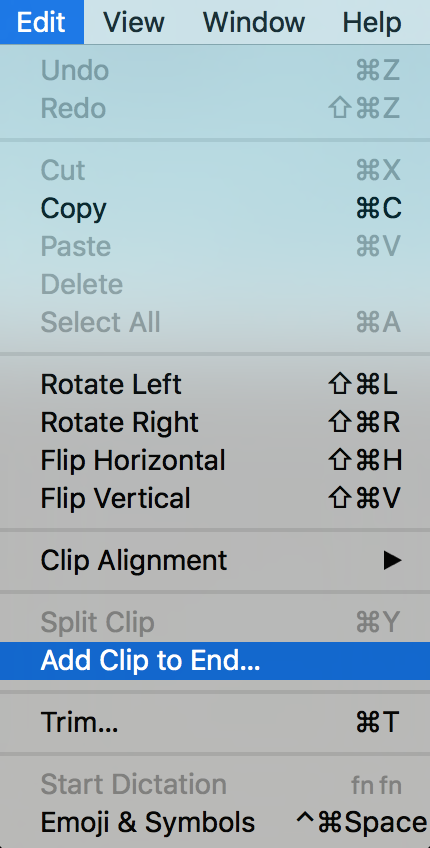
You can repeat the Add Clip to End function to combine multiple clips in QuickTime, and once you’ve added one or more clips to the end of your current video file, you can drag them around to change their order. To reduce editing time, you can also hold down the Option key on your keyboard while looking at QuickTime’s Edit menu and you’ll find that “Add Clip to End” switches to “Add Clip to Beginning.”
Make no mistake, QuickTime lacks the more advanced editing features found in iMovie, Final Cut Pro, or Premiere, but it’s certainly possible to make minor edits to your videos with selective use of the Trim and Add Clip functions. When your creation is ready to go, QuickTime also provides a variety of export options under the File menu.
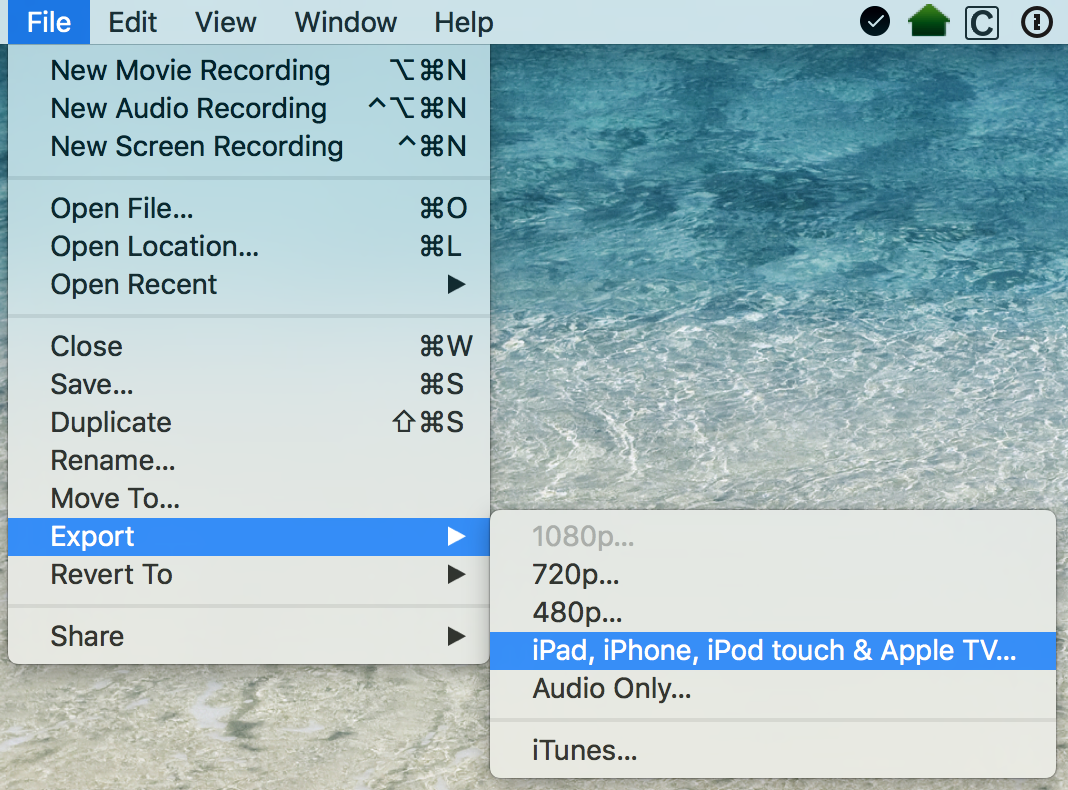
QuickTime offers export presets based on device support or resolution, but it won’t allow you to export at a resolution which exceeds that of your source files. For example, if you’ve edited together a bunch of files at 720p resolution, you won’t be able to export at 1080p resolution. This is generally a good thing as re-encoding video at larger-than-native resolution will make the file size larger without any increase in quality, but if you absolutely need to export at a certain upscaled resolution, you’ll need to use a more advanced application or a third party video encoding utility. Also note the awesome “Audio Only” choice at the bottom there. Pick that, and you can create an .m4a file with just the audio from your movie. Neat!
Need more info on QuickTime video editing on the Mac? We’ve got you covered. For details about the formats that QuickTime will work with, check out Apple’s related support page. And if you just want to learn more about QuickTime and all of the fun stuff it can do, there’s a page for that, as well. I highly recommend using the File > New Screen Recording feature to send instructional videos if you’re doing tech support, for example!


One thought on “How to Edit Video on Your Mac with Quicktime”
i m using macbook intel M3 1.1GHz 8GbRAM 256gb rom